Introduction
Events
Create the individual events that will run as part of your carnival.
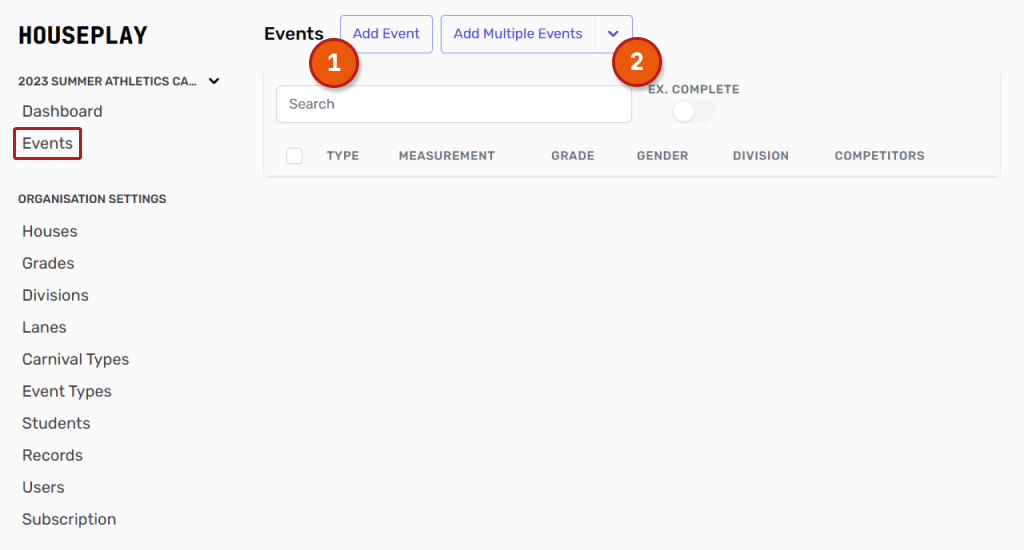
To begin setting up your events, navigate to 'Events' under the carnival dashboard in the left hand menu. This will take you to a new page.
From here you can add events by:
1 - Add Event Button - Add events individually
2 - Add Multiple Events Button - Create multiple events at once. This option is helpful if you run the same event type in multiple formats (eg. you may run a 400m Relay Race for each year level)
 Adding Single Events
Selecting 'Add Event' will take you to a new page where you can input the event information manually.
The list below will give you some pointers for each field:
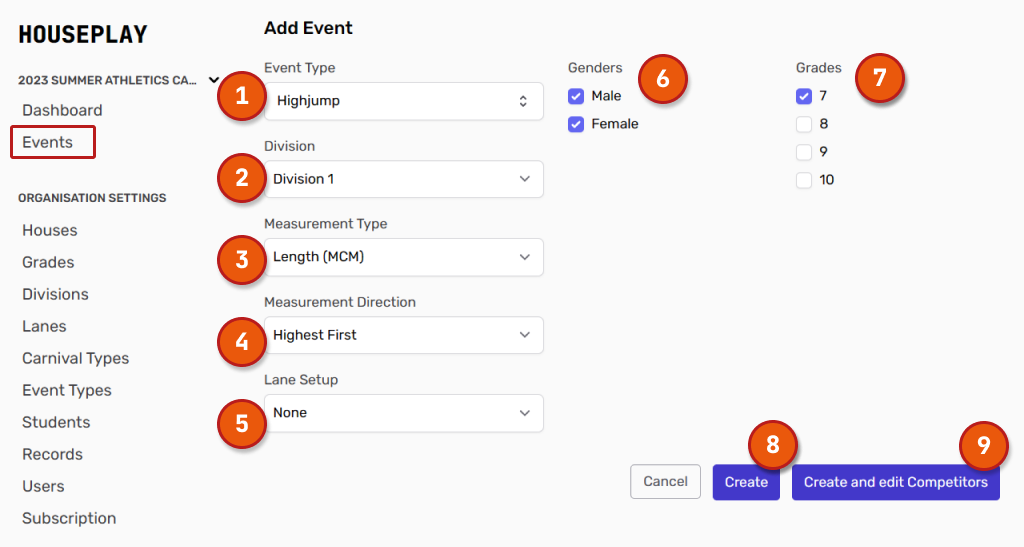
Event Type - Select from the drop down menu. These are the event types that you set up earlier. If you need to add additional event types you can go back to the 'Event Types' page and add them. (This is a required field).
Division - Select from the drop down menu. These are the divisions that you set up earlier. If you need to add additional divisions you can go back to the 'Divisions' page and add them. (This is a required field).
Measurement Type - Select an option from the drop down menu. (This is a required field).
Measurement Direction - Select an option from the drop down menu. (This is a required field).
Lane Setup - This is an optional field. Select from the drop down menu. These are the lanes that you set up earlier. If you need to add additional lanes you can go back to the 'Lanes' page and add them.
Genders - Select which genders will be competing in this event. (This is a required field).
Grades - Select which grades will be competing in this event. The grades that appear here are the ones you set up earlier. If you need to add additional grades you can go back to the 'Grades' page and add them. (This is a required field).
Create button - Click this button to save this event. You can add students later.
Create and edit competitors button - Click here to save and then go to the next screen to add competitors straight away.
Add Multiple Events
The option of adding multiple events is a useful tool when you will be running the same type of event, but with multiple iterations of divisions, genders and grades.
For example, you may have a 50m Sprint. You would like to run two races per grade, split up into Division 1 and 2. You would also like to split it further by gender. Let's use this example to show how this feature works.
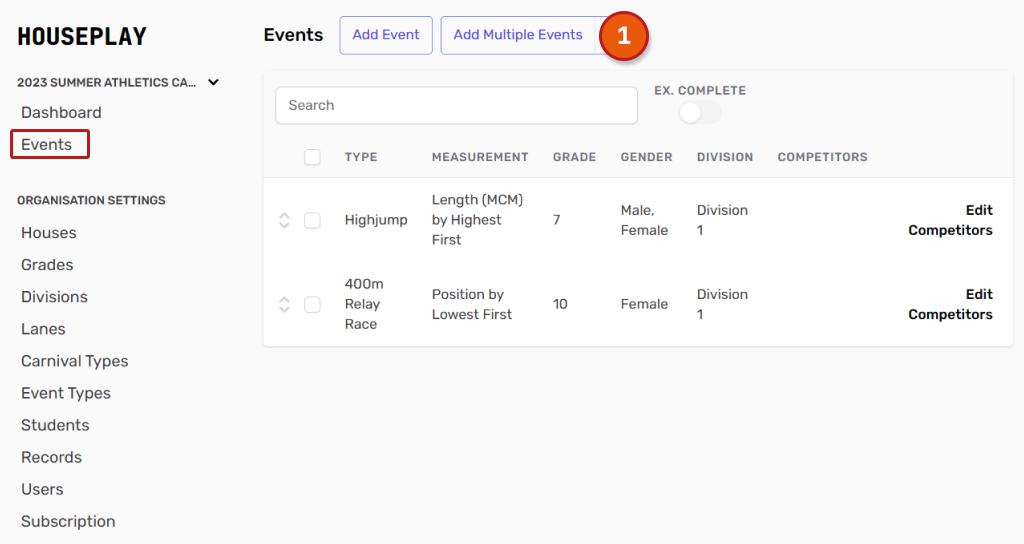
Start by navigating to 'Events' under the carnival dashboard in the left hand menu. Then click the 'Add Multiple Events' button (1):
 This will take you to the 'Add Multiple Events' page. From here you can fill in the fields depending on the event type. See below for information on each field:
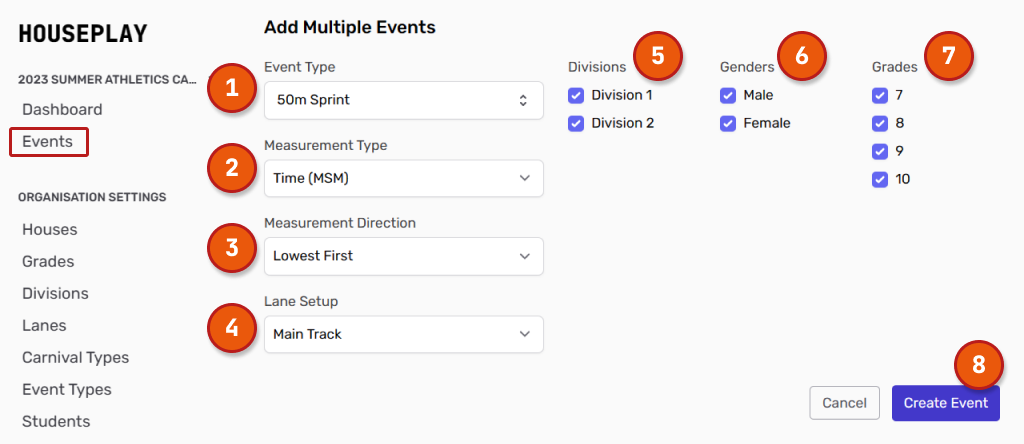
Event Type - Select from the drop down menu. These are the event types that you set up earlier. If you need to add additional event types you can go back to the 'Event Types' page and add them. (This is a required field).
Measurement Type - Select an option from the drop down menu. (This is a required field).
Measurement Direction - Select an option from the drop down menu. (This is a required field).
Lane Setup - Select from the drop down menu. If you do not require a lane setup, you can simply select 'None'. These are the lanes that you set up earlier. If you need to add additional lanes you can go back to the 'Lanes' page and add them.
Divisions - Check the boxes for the divisions you wish to create events for.
Genders - Check the boxes for the genders you wish to create events for.
Grades - Check the boxes for the grades you wish to create events for.
Create button - Click this button to save this event. You can add students later.
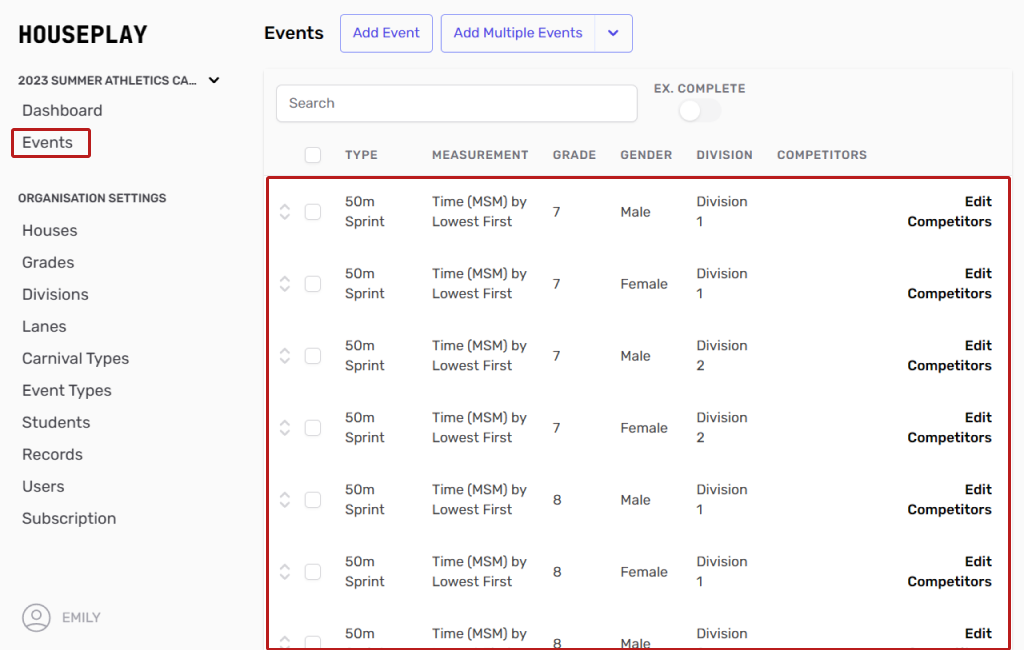
You can see how it has automatically created 16 different events based on our criteria (one event for each combination of division, grade and gender):
 Adding Competitors to Events
Once you have some events created, you will want to add some competitors to them. To do so, click the 'Competitors' link on the event listing page.
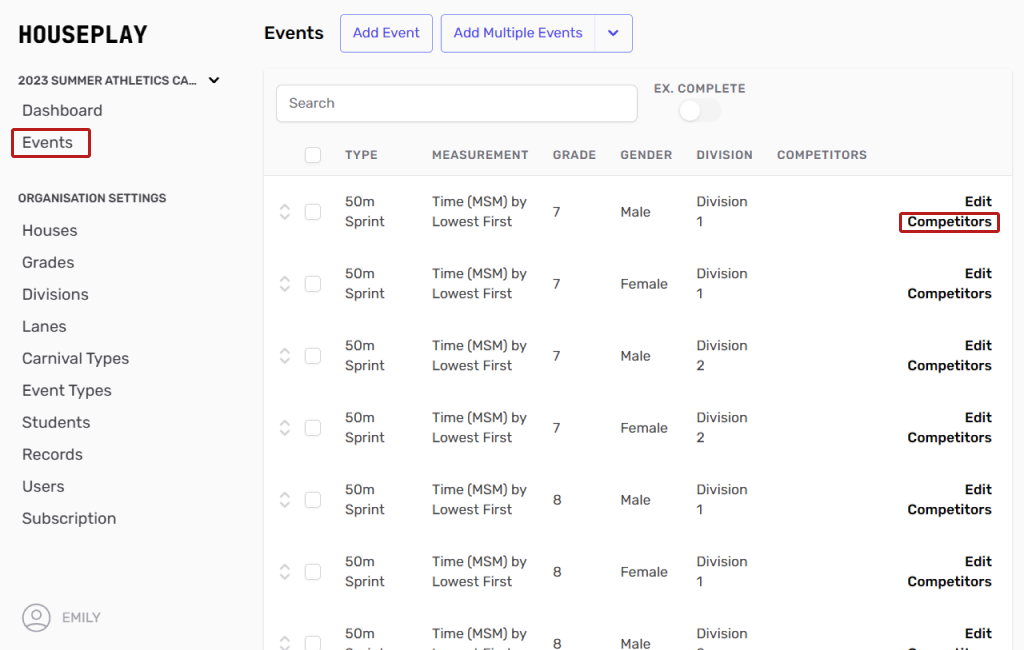 This will cause a new page to open.
Adding Students to Events
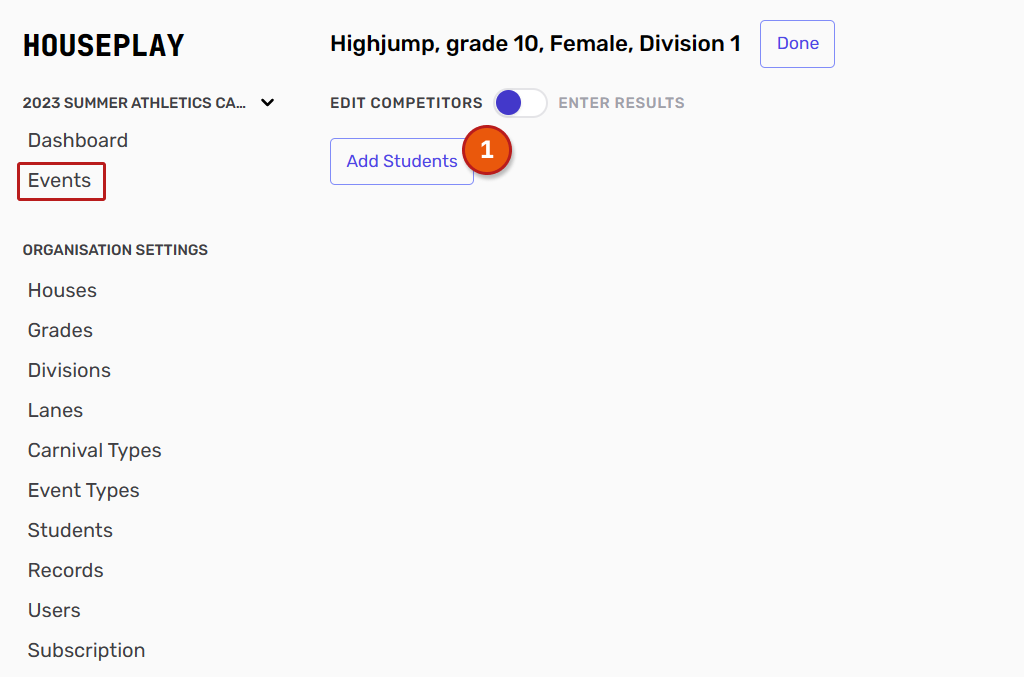
Start by clicking the 'Add Students' button. This will cause a pop-up window to open.
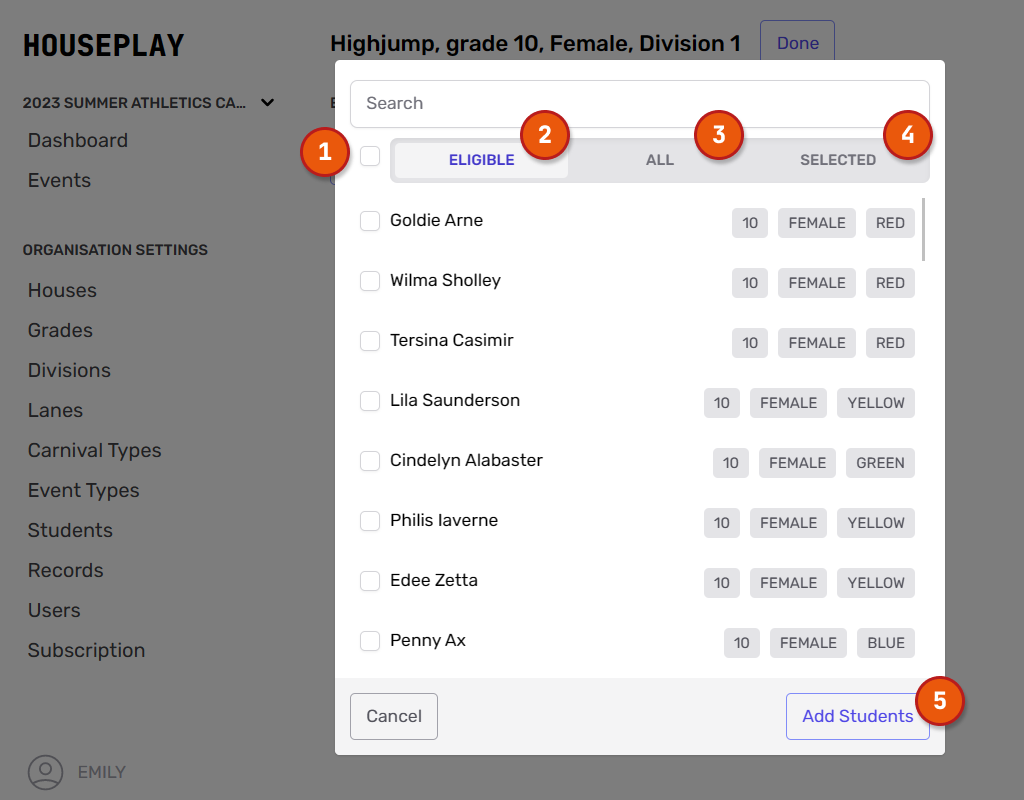
When the pop-up window opens, you can select the students you would like to add to the event. See the list below for an explanation of each section:
Click this box to select all students. Or, you can select individual students by clicking the tick-box next to their name.
Eligible - filter by students that are eligible to compete in this event. These parameters are set by the grades, houses and/or genders that you added when you created this event.
All - display all students.
Selected - filter by students that you have selected so far. This is useful if you wish to remove some students you have already added to the event.
Once you are happy with your student selection, click the 'Add Students' button. This will take you back to the previous screen, but this time with students!
 Once you are back on the event page, you can now click the 'Done' button (1).
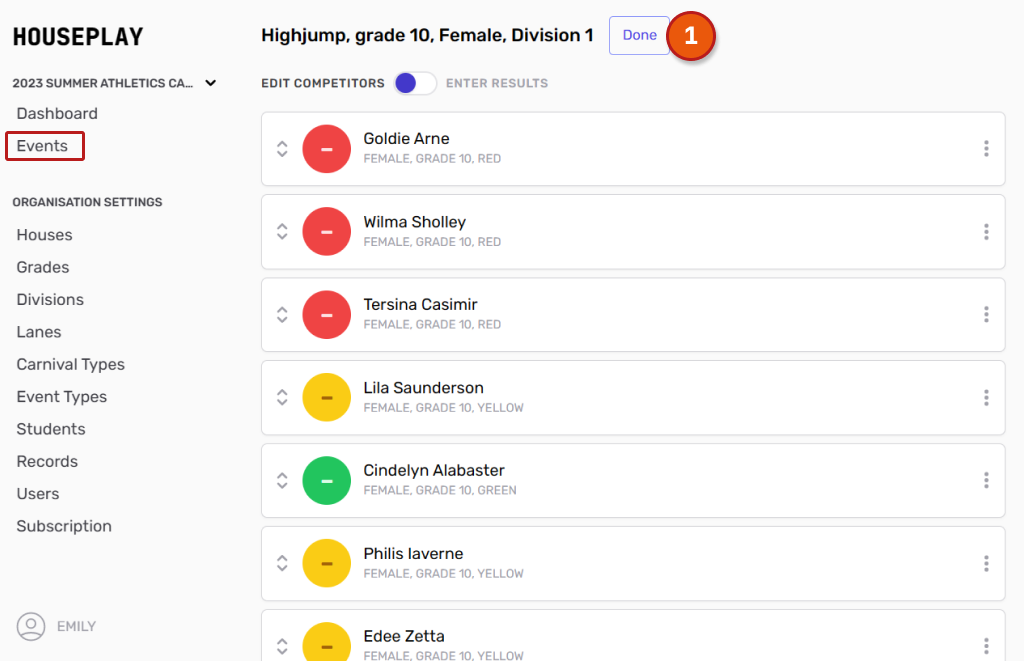 You now have added the students to the event. You can repeat this process with other events as required.
Adding Teams to Events
In some cases, you will want to add a team of students rather than an individual students, like in a relay race. To add a team to an event:
Start by clicking the 'Add Team' button. This will cause a pop-out window to open where you can select the House of the team you are creating.
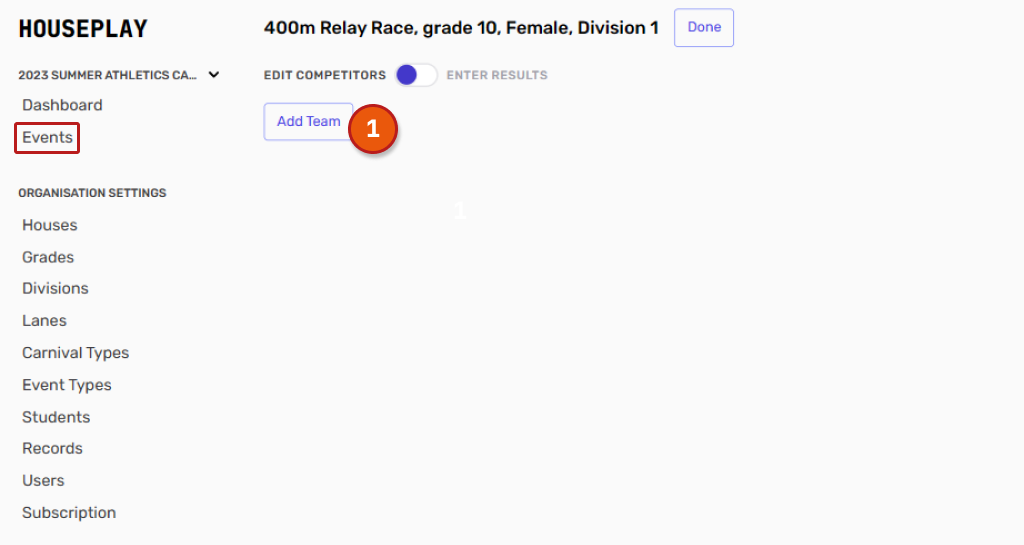 If you would like to add specific students as members of the team, you may do so by clicking the 'Team Members' link, but this is not required.
Once you are back on the event page, your teams should look as the do on the example below. You can edit or adjust as needed using the various buttons. If you are happy with how they all look, you can now click the 'Done' button (1).
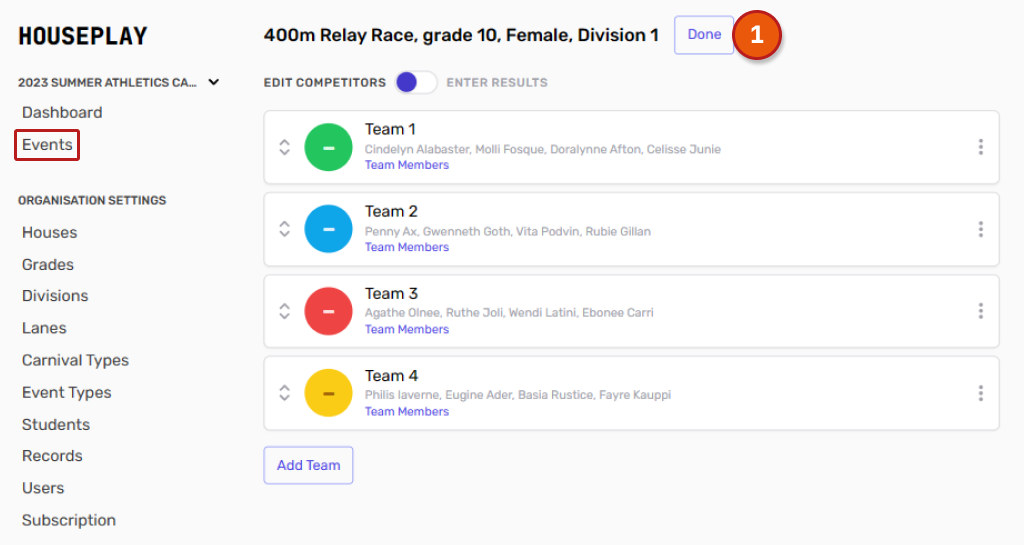 You now have added the students to the team and the teams to the event. You can repeat this process with other events as required.
Next Steps
Repeat these steps until you have created your desired about of events. Once you have added all your events and students, it's time to run your carnival.